
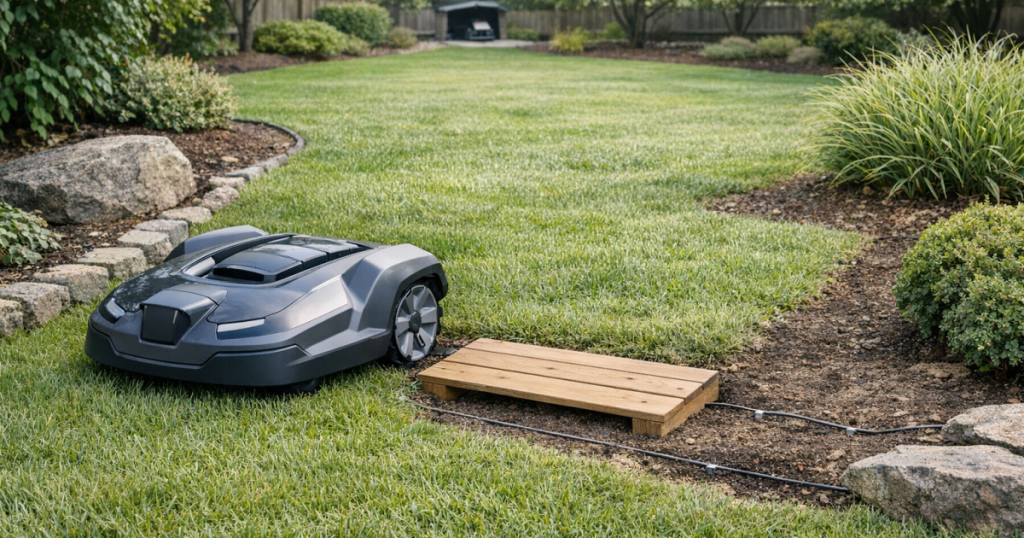
When your mower stops in the same dip, corner, curb edge, or root zone every few runs, the problem is rarely random. A robot mower stuck in same spot issue usually means the machine is meeting the same physical or mapping limit over and over, so the fix starts with diagnosing that location instead of blaming the whole mower.
Start by treating the stuck spot like a tiny crime scene: look at the mower’s position, wheel marks, cutting height, nearby obstacles, and the way the boundary or map behaves there. A small rut, a wet slope, or an awkward turn can be enough to stop an otherwise healthy mower.
The big picture
The quickest way to solve repeat stuck alerts is to identify the type of spot, test one change at a time, and verify the mower can pass through on a normal run. Most repeat failures fall into one of these patterns:
- High-centered dip: the mower belly or deck touches the ground while the wheels lose bite.
- Curb or driveway drop: one wheel drops off an edge and the mower cannot climb back cleanly.
- Root or raised bump: the mower catches, tilts, or spins on uneven ground.
- Slope slip: the mower turns, brakes, or climbs on grass that does not give the wheels enough traction.
- Tight corner: the mower repeatedly turns into a fence, wall, bed edge, or narrow passage.
- Obstacle trap: toys, hoses, planters, edging, or outdoor furniture create a pocket the mower can enter but not leave easily.
- Boundary or map issue: the mower is being guided too close to a trouble spot, or its virtual map/no-go zone does not match the real lawn.
Step 1: Confirm it is the same failure, not just the same area
Before changing the yard, note exactly how the mower is stuck. Is it nose-first against edging? High-centered with its wheels spinning? Pointed downhill on wet grass? Sitting just outside the boundary? These details matter because two stuck alerts near the same flower bed can have different causes.
Run the mower again when the grass is dry and watch that location from a safe distance. Do not lift, tip, or inspect the underside while the mower is active. Pause or stop it first, and follow the manufacturer’s handling instructions before clearing debris or checking blades.
If it passes once but fails after rain or irrigation, suspect traction. If it fails every time, suspect geometry: a dip, edge, root, corner, passage width, or boundary placement.
Step 2: Match the stuck spot to the right fix
If the mower is high-centered in a dip
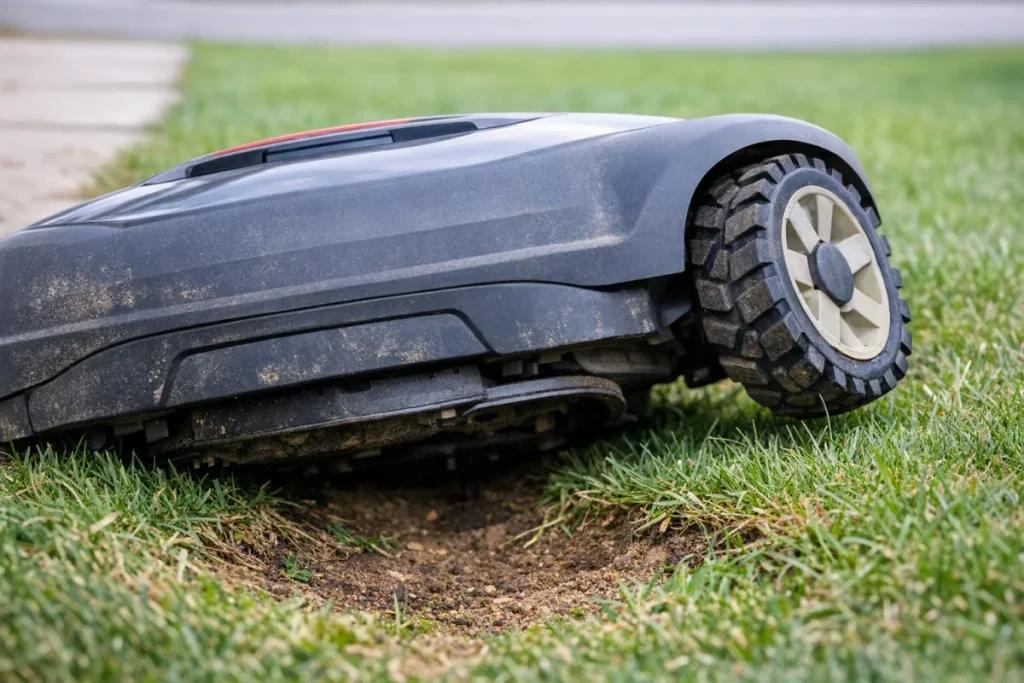
A high-centered mower usually has part of its body or cutting deck resting on the ground while one or more wheels lose contact. This often happens in shallow drainage swales, tire ruts, low seams near sidewalks, or lawns that have settled around buried lines.
The fix is usually physical, not electronic. Fill the depression gradually with compatible topsoil or lawn leveling mix, keep the repair smooth, and avoid creating a hard mound that scalps later. If the mower has adjustable cutting height, raising the height slightly can help during the repair period, but it should not be the only fix if the body is dragging.
If a curb, sidewalk, or driveway edge catches it
Repeated curb-edge failures happen when the mower drops a wheel over an edge, climbs at a bad angle, or tries to turn while partly on hardscape. The cleanest solution is a gentler transition: reduce the lip with soil grading where appropriate, widen the passage, or adjust the route so the mower crosses squarely instead of diagonally.
If the stuck location is part of a passage between separate lawn areas, routing matters. Our guide to moving a robot mower across a driveway explains how crossing angle, guide paths, and hardscape edges can make the difference between a smooth transfer and a repeat rescue mission.
If roots or bumps stop the mower
Tree roots, exposed sprinkler heads, raised edging, and lumpy soil can lift one side of the mower just enough to confuse traction or navigation. Do not grind roots down casually; exposed roots may be important to the tree. Instead, improve the surrounding grade, trim grass around the obstruction, or create a no-go zone if the area is too uneven to mow reliably.
For sprinkler heads and edging, the goal is simple: the mower should meet a smooth surface transition, not a surprise step. If a wheel repeatedly climbs, slips, and pivots, the mower is telling you the obstacle is shaped badly for autonomous mowing.
If the mower slips on a slope
Slopes cause repeat stuck alerts when the mower loses traction during a turn, on wet grass, or while climbing across the slope rather than straight up or down. Look for polished grass, muddy wheel marks, or repeated spin patterns.
First, test the area dry. Then reduce mowing during slick conditions, adjust the mowing window, and consider whether the mower is being asked to turn in the steepest part of the slope. Hot, stressed, or damp turf changes how a mower behaves, so schedule changes can be a real troubleshooting tool. For seasonal timing ideas, see our guide to adjusting a robot mower summer heat schedule.
If slope slipping continues even in dry conditions, the location may exceed what that mower can handle consistently. In that case, reshape the route, exclude the steepest patch, or compare slope-capable and all-wheel-drive mower designs before replacing the machine.
If a tight corner traps it
Tight inside corners are classic stuck spots because the mower can enter at a workable angle but leave with no room to turn. Watch for repeated bumper contact, wheel scrubbing, or a path that funnels the mower into a fence, wall, raised bed, or gate post.
For boundary-wire systems, moving the wire farther from the obstacle can create a wider turning zone. For wire-free systems, adjust the virtual boundary or add a small exclusion area so the mower no longer tries to shave an impossible corner. A little unmowed triangle is better than a mower that needs rescuing twice a week.
If an obstacle creates a trap
Some stuck spots are temporary. A coiled hose, soccer goal, firepit chair, fallen branch, dog toy, or portable planter can turn a normal lane into a trap. The fix is not a mower setting; it is a cleaner mowing environment.
Walk the route and remove movable items before scheduled mowing. If an object stays in place all season, treat it like landscape structure and update the boundary, no-go zone, or wire placement around it.
If the boundary wire or map is the real cause
When the mower stops near the same boundary line, guide wire, virtual edge, or docking route, the mower may be following instructions that are too tight for the real yard. A boundary can be technically valid and still be impractical if it sends the mower into a rut, curb drop, narrow neck, or corner pinch.
For wired installations, inspect the wire path, stakes, couplers, and connectors near the problem area. A damaged or poorly placed wire can create odd behavior, and a clean re-route can solve the issue more reliably than repeated app adjustments. If you are rebuilding a larger wired layout, the Husqvarna Large Installation Kit review is useful background on what a boundary-wire setup bundle typically includes.
For wire-free mowers, remap the problem edge only after you have fixed obvious ground issues. If the lawn itself is still trapping the mower, a prettier digital boundary will not change the physics.
Step 3: Decide between a no-go zone and a lawn repair
Use a no-go zone when the area is small, awkward, risky for the mower, or not worth perfect automation. Examples include exposed roots, a tight playset leg pattern, a drainage grate, or a narrow mulch edge that changes after rain.
Physically fix the lawn when the trouble spot is in a normal mowing lane and should be passable. Fill dips, smooth ruts, stabilize bare soil, trim low vegetation, or soften hard edges. This gives better long-term results because the mower can keep its route instead of working around an expanding collection of digital patches.
As a rule of thumb: if people also notice the bump, hole, or edge while walking across the lawn, repair the ground. If the spot is only a problem because a robot mower is trying to make a very precise turn, adjust the boundary or add a no-go zone.
Common mistakes that keep the problem coming back
- Changing several settings at once: you will not know which fix worked. Adjust one variable, then test.
- Blaming the blades first: dull blades affect cut quality, but they rarely cause the same-location stuck pattern unless debris is also involved.
- Ignoring wet conditions: a mower that works on dry turf may struggle after irrigation, dew, or rain.
- Over-tightening the route: narrow passages and close edge cutting look efficient on a map but can reduce real-world reliability.
- Using no-go zones for every dip: too many exclusions can make coverage patchy. Fix normal lawn surface problems when possible.
How to verify the fix
After making one change, run the mower through the problem area under the same conditions that caused the alert. If it used to fail in the morning dew, test during a similar morning window. If it failed while returning to charge, test the return route, not just a random mowing pass.
Look for a clean pass, normal wheel movement, and no repeated bumper taps or wheel spin. Then monitor the next few sessions before making more changes. Reliable robot mower ownership is often built from small, boring improvements, which is good news: boring fixes usually stay fixed.
Key questions answered
Why does my robot mower stop in the same place but not every time?
Intermittent same-area failures usually involve changing conditions: wet grass, longer growth, a movable obstacle, soft soil, or a turn angle that only happens on certain routes. Track the time, weather, and mower direction when it fails.
Should I replace the mower if it keeps getting stuck?
Not until you diagnose the spot. A different mower may help if the issue is slope grip, ground clearance, drive type, or navigation style, but many repeat stuck alerts are solved by grading, boundary adjustment, or removing an obstacle trap.
Can lowering the cutting height cause stuck problems?
Yes, indirectly. A lower cut can expose uneven ground and make the mower more likely to drag over dips, roots, or raised edges. If the problem started after a height change, raise the deck temporarily and inspect the surface.
Practical takeaway
A repeat stuck alert is useful information, not just an annoyance. The mower is marking the exact place where your yard layout, ground surface, boundary setup, or mowing conditions stop being reliable. Identify the stuck-location type, make the smallest sensible fix, and test it under real conditions before changing anything else.