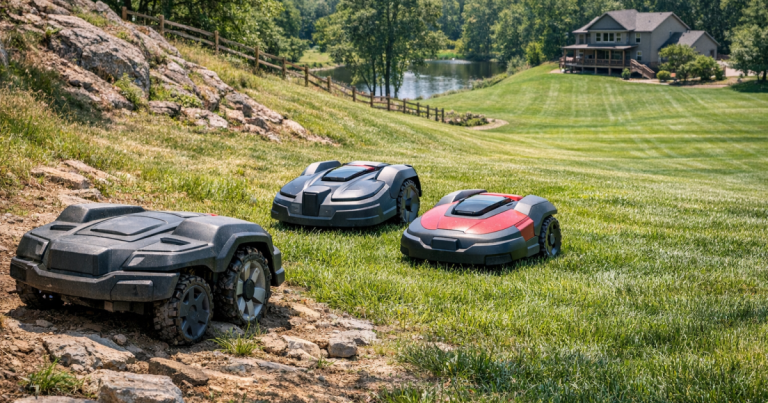
A good robot mower setup starts before the mower ever leaves the box. The goal is not just to make the machine move; it is to give it a clear charging location, reliable boundaries, and a lawn surface it can cut without fighting roots, toys, hose loops, or dead signal pockets.
Installing a new outdoor electrical outlet or altering wiring for the charging station should be carried out by a qualified electrician to meet local code, GFCI protection requirements, and outdoor electrical safety standards.
Main points before you start
To set up a robot mower in a US yard, first measure the mowable lawn area, choose a level charging-station spot near a safe outdoor outlet, clear hazards, define the mowing boundary, set no-go zones around beds and obstacles, test the mower at the lowest-risk schedule, and adjust the layout after several real mowing cycles. Boundary-wire models need a physical loop around the lawn. Wire-free models still need careful mapping, signal checks, and edge testing.
- Walk the yard before installing anything. Look for slopes, ruts, exposed roots, narrow side-yard passages, mulch edges, drains, and pet areas.
- Plan the mower’s route back to its charging station. A robot that cannot reliably dock will not feel convenient.
- Match setup choices to your yard, not the neighbor’s. Fences, trees, house walls, metal sheds, and corner-lot shapes can change what works.
- Expect a tuning period. The first week is about finding weak spots, not proving the mower was a mistake.
If you are still deciding whether an automated mower is realistic for your lawn shape, start with the home page and compare your yard conditions before buying installation supplies.
Step 1: Measure the lawn the mower will actually cut
Do not use the full property size from a real estate listing. A robot mower cares about mowable grass, not the driveway, house footprint, patio, pool deck, garden beds, shed, or wooded strip behind the fence.
Break the lawn into practical zones: front yard, back yard, side strips, fenced dog area, boulevard strip, and any separated patch across a walkway. Then estimate each area in square feet or acres. If the mower’s rated coverage is close to your calculated area, give yourself margin for slopes, tight turns, complex edges, and hot-weather growth surges.
Step 2: Walk the yard like the mower will
A robot mower is low to the ground and follows rules you give it. Before you install the dock or map the lawn, walk every edge at mower height in your mind.
- Pick up toys, dog bowls, garden tools, extension cords, and loose branches.
- Mark sprinkler heads, valve boxes, shallow drains, and invisible fence wires before placing stakes or boundary wire.
- Check for roots that could lift the mower, scrape blades, or cause repeated bumping.
- Look at slope transitions, not just steep hills. A short drop near a sidewalk can matter as much as a long gradual grade.
- Note areas that stay wet after rain, since soft turf can rut or trap wheels.
For any staking, trenching, or wire burial, use 811 before digging so underground utilities are marked according to US safe-digging practices. Even shallow yard work can cross irrigation, landscape lighting, cable, or utility paths.
Step 3: Choose the charging-station location
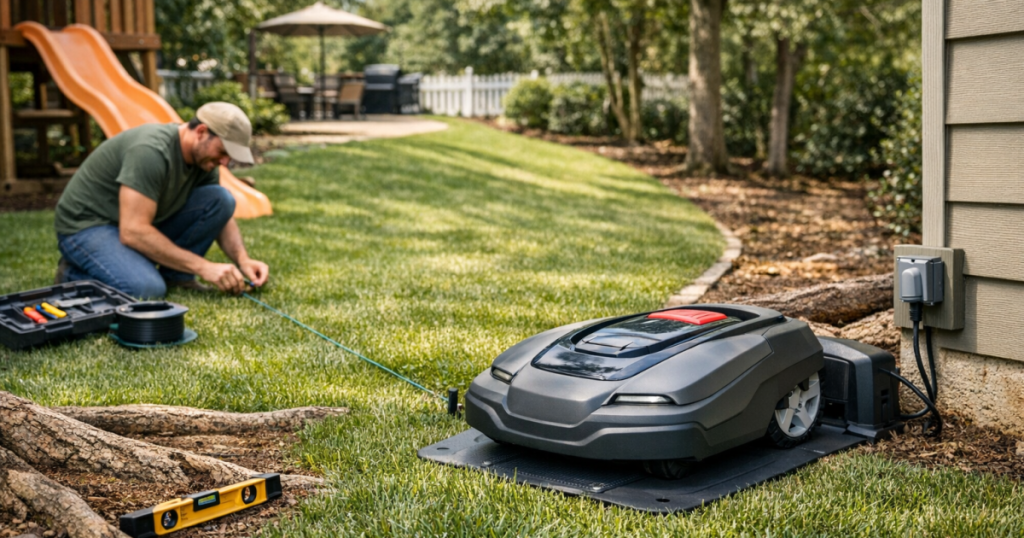
The charging station should be boring in the best way: flat, reachable, protected from constant foot traffic, and easy for the mower to enter straight. Most homeowners do better placing the dock along a clean lawn edge rather than hiding it behind patio furniture or squeezing it into a tight corner.
- Use a manufacturer-approved outdoor power setup and route cords where they will not be cut, tripped over, pinched, or submerged.
- Leave open approach space in front of the dock according to the mower manual.
- Avoid placing the station in a low spot where water pools during summer storms.
- Think about Wi-Fi, Bluetooth, or app access if your mower uses connected controls, but do not sacrifice docking reliability just to improve phone convenience.
- If your yard has a fenced back lawn and open front lawn, decide whether the mower will move between them safely or whether the areas need separate handling.
Step 4: Decide how the mower will know the boundary
There are two broad setup paths: boundary-wire systems and wire-free systems. Neither is automatically better for every US yard. The right choice depends on edges, tree cover, buildings, slope, and how much installation work you are willing to do.
Boundary-wire setup
A boundary-wire mower follows a physical wire placed around the mowing area and around no-go zones. The wire can usually be staked at the surface to test the layout before you commit to burying it. This is useful because most first layouts need small corrections around gates, flower beds, and tight corners.
For a traditional wired installation, a kit such as the Husqvarna Large Installation Kit can help when it matches your mower system and yard size needs. Check compatibility before buying, because wire gauge, connectors, and system requirements are not universal across brands.
Wire-free mapping
A wire-free mower uses onboard positioning, cameras, LiDAR, RTK, or a related navigation approach depending on the model. Setup usually means walking or driving the mower around the edge in an app, placing any required reference equipment, and defining mowing zones digitally.
Wire-free does not mean effort-free. Houses, dense tree cover, narrow side yards, metal structures, and steep transitions can affect mapping or path reliability. After mapping, run the mower in daylight while you watch the first full boundary pass. If it cuts too close to a planting bed, hesitates near a wall, or misses a strip by the driveway, adjust the map before leaving it unattended.
Step 5: Create no-go zones and safe margins
Robot mowers are designed to avoid many obvious obstacles, but setup should not rely on obstacle detection alone. A good layout gives the mower fewer chances to make a bad decision.
- Set exclusions around ponds, fire pits, play sets, exposed tree roots, vegetable beds, and low landscape lighting.
- Use generous margins near drop-offs, retaining walls, and unfenced water features.
- Keep the mower away from loose gravel and mulch edges where wheels can slip or drag material into the lawn.
- For yards with dogs, create a routine for checking the grass before mowing and do not assume pet waste, chew toys, or bowls will always be detected.
- For children’s play areas, schedule mowing when the lawn is clear and supervised access is not expected.
Step 6: Set cutting height and schedule conservatively
Start higher than you think, especially if the lawn has been maintained by a traditional mower. Robot mowers usually work best by trimming small amounts frequently rather than taking down tall grass in one pass. A conservative first schedule protects the turf and gives you time to spot trouble.
Cool-season lawns common in much of the northern US and transition zones often benefit from avoiding overly short cuts during heat stress. Warm-season lawns in many southern areas have different mowing-height preferences. Use the mower’s adjustment range and your grass type as the guide, not a one-size-fits-all setting.
Do the first run when you can stay home. Watch how the mower handles the dock, first turn, main edges, narrow passages, and the return path. If the mower struggles in the same place twice, stop and fix the layout instead of hoping it improves.
Step 7: Test zones one at a time
Multi-zone yards are where setup quality really shows. A front yard, fenced back yard, and narrow side passage may all be on the same property, but the mower experiences them as separate challenges.
- Start with the simplest open area first, then add complex zones after the mower proves it can dock and cut reliably.
- Test gates in their normal position. A gate that is sometimes open and sometimes closed can confuse a routine.
- Check whether the mower can pass through narrow side yards without scraping fences, edging, or AC pads.
- For separated lawn strips, decide whether carrying the mower manually is simpler than forcing an awkward automated route.
For more owner-focused setup, maintenance, and troubleshooting topics, the setup and ownership articles are a useful next stop once the mower is running.
Step 8: Tune the first week instead of judging the first hour
The first mow is a systems check. The first week is where the lawn starts to settle into a routine. Keep notes on where the mower bumps, stalls, misses grass, loses its route, or returns with heavy clippings stuck underneath.
- If the mower misses edges, adjust boundary placement or digital map margins gradually.
- If it gets trapped, fix the physical cause: fill a rut, trim low branches, move edging, or exclude the area.
- If it docks poorly, improve the approach path before changing unrelated settings.
- If cut quality looks uneven, confirm the blades are clean, sharp, installed correctly, and appropriate for the mower.
Replacement blades are routine ownership items, not an emergency purchase. For compatible Automower models, Husqvarna Automower Endurance Blades are one example to compare against your mower’s required blade type and screw hardware.
Common setup mistakes that cause frustration
- Installing the dock first and only then noticing the mower cannot make a clean return path.
- Mapping too tightly around beds, fences, pools, or retaining walls.
- Assuming a wire-free model will ignore tree cover, building shadows, or tight side-yard signal problems.
- Skipping the yard cleanup and blaming the mower for hitting toys, sticks, hoses, or landscape stakes.
- Trying to automate every patch of grass, even when one small strip would be easier to trim manually.
- Starting with an aggressive schedule before the mower has proven it can handle the layout.
Straight answers
Can I set up a robot mower myself?
Many homeowners can handle basic placement, mapping, boundary-wire layout, and app setup by following the mower manual carefully. New electrical work, buried utility conflicts, and complex installations near slopes, walls, water, or public sidewalks deserve more caution and may require professional help.
How long does setup take?
A simple open lawn can be planned and tested much faster than a multi-zone property with fences, trees, narrow passages, and complex beds. Plan on extra time for corrections after the first few mowing cycles rather than treating installation as a one-and-done task.
Do I need boundary wire?
Only if your mower uses a wired boundary or if a hybrid model is being installed that way. Wire-free models avoid the physical loop, but they still require accurate mapping, signal-aware placement, and careful testing around edges and hazards.
Should the mower run in rain?
Follow the mower manufacturer’s rain-handling instructions. Even when a mower is designed for outdoor use, wet turf, storms, drainage problems, and soft soil can affect traction, cut quality, and lawn health.
What to remember
A successful setup is less about getting every setting perfect on day one and more about giving the mower a yard it can understand. Measure the mowable area, choose the dock location carefully, define clean boundaries, protect risky zones, start with conservative cutting, and observe the first few runs.
Robot Lawn Mower Guide may earn commissions from qualifying links; the affiliate disclosure explains how that works without changing the practical yard-fit advice above.