After winter storage, the first mow should be a controlled restart, not a quick shove onto the lawn. A careful robot lawn mower spring startup helps you catch weak batteries, dirty charging contacts, stale maps, and soft turf before they turn into frustrating errors. Give yourself 30 to 60 minutes on a dry day and keep the first run supervised.
What to know first
Restarting a robot mower in spring works best as a sequence: inspect the mower, wake up the battery, clean the charging contacts, check the dock and any RTK or reference equipment, prepare the lawn, update the app, raise the first cut, then watch the first full run. Do not judge the mower by the first five minutes; judge it after it has charged correctly, left the station cleanly, recognized its work area, and completed a short mowing session without repeated errors.
The goal is not to make the lawn perfect on day one. The goal is to bring the mower back into service gently so the electronics, blades, wheels, sensors, boundary system, and grass all get an easy first pass.
If you want a broader seasonal routine after the restart, keep the robot lawn mower maintenance checklist handy for blade changes, cleaning, charging contacts, and year-round care.
Step 1: Bring the mower out and inspect it before charging
Start with the mower turned off and placed on a stable surface. Winter storage can leave dust, dried grass, spider webs, and light corrosion in places you barely noticed in the fall.
- Check the body shell for cracks, loose panels, or missing screws.
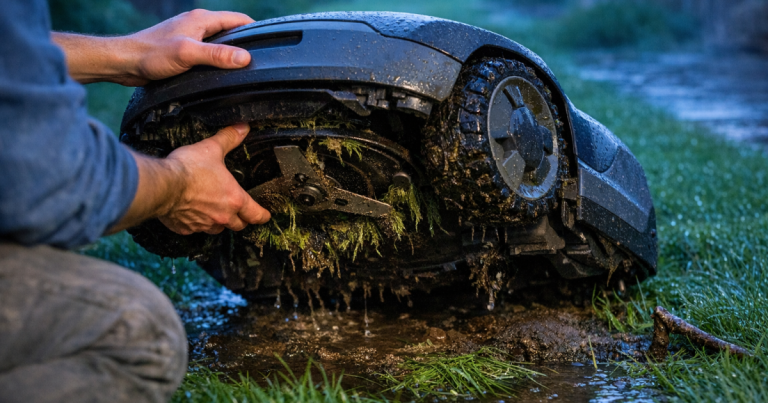
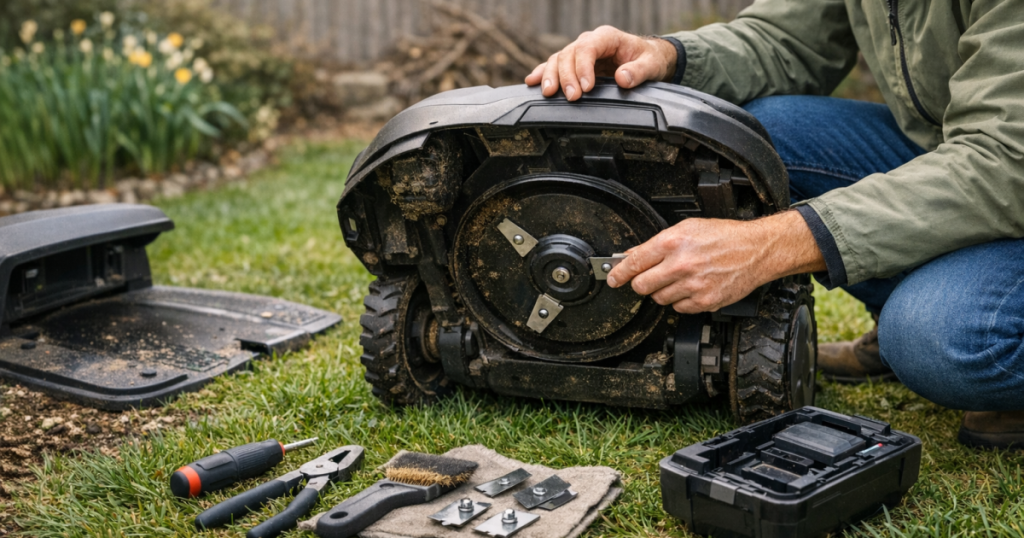
- Look underneath for clumped grass, twigs, acorns, or dried mud around the cutting disc.
- Spin the wheels by hand and check for binding, packed debris, or wobble.
- Inspect the blades and blade screws. Replace blades that are bent, chipped, rusty, or dull.
- Clean around sensors, camera windows, LiDAR housings, or ultrasonic openings with a soft cloth if your mower uses them.
- Make sure the emergency stop button, lift detection, and main power switch move normally.
Do not pressure-wash the mower unless the manufacturer’s instructions specifically allow that cleaning method. A damp cloth, soft brush, and patient detail cleaning are usually safer for routine spring prep.
Step 2: Wake up the battery the boring way
Battery care is one place where rushing rarely pays off. Put the mower on its charging station and let it charge fully before asking it to mow. If the mower has been stored correctly, it should wake up normally, but the first charge may take longer than a midseason top-up.
Watch for basic signs: the mower powers on, the app or display recognizes the battery, the dock shows normal charging behavior, and the mower does not repeatedly connect and disconnect. If it fails to charge, remove it from the station, turn it off, inspect the charging contacts, then reseat it carefully.
If the mower was stored in a place that dipped below freezing, let it return to a moderate indoor temperature before charging. Charging a very cold battery is not a good habit, and many modern electronics are designed to protect themselves when conditions are outside their normal operating range.
Step 3: Clean and confirm the charging station
The dock sits at the center of the whole system, so treat it like more than a parking spot. A mower can look fine and still fail its first run because the station is crooked, dirty, blocked, or poorly powered after winter.
- Clear leaves, mulch, sticks, and packed soil from around the base.
- Clean the dock contacts and mower contacts with a dry cloth first, then follow the manufacturer’s cleaning instructions if residue remains.
- Check that the dock is level and has not shifted from frost heave, pets, snow shovels, or lawn work.
- Make sure the approach path is open for several feet so the mower can leave and return cleanly.
- Confirm the power supply is dry, undamaged, and connected as intended.
For boundary-wire systems, inspect visible wire sections near the dock, splices, couplers, and any places you repaired last season. For wire-free systems, check the station position, saved map status, and any reference equipment before mowing. Vision-based and mapping models, such as the approach discussed in the Worx Landroid Vision Cloud 4WD WR341 review, depend heavily on clear starting conditions and recognizable yard edges.
Step 4: Check RTK, antenna, and map-related gear
If your mower uses RTK, GNSS, LiDAR, cameras, beacons, or a saved virtual boundary, spring is the time to verify the system before the grass gets ahead of you. Trees leaf out, patio furniture moves, fences get repaired, and new mulch beds appear. Any one of those changes can affect how confidently a wire-free mower understands the yard.
Start by powering on the mower and opening the app. Confirm the mower, charging station, and any reference device are connected and reporting normally. If the app prompts for firmware or software updates, install them before the first mow, then give the mower time to reboot and reconnect.
Walk the saved boundary in the app if your mower allows it. Look for obvious mismatches: a new raised bed, a widened play area, a relocated trampoline, or an edge that was mapped tightly against a driveway last year but now needs more clearance. If the yard changed materially, remap rather than hoping the mower will improvise.
Step 5: Prepare the lawn before the mower sees it
The first spring run is hardest when the mower has to handle winter debris and a jumpy lawn surface at the same time. Give the yard a quick reset first.
- Pick up branches, pine cones, toys, hoses, dog bones, sports equipment, and holiday light stakes.
- Rake heavy leaf mats so the mower is not driving blind over hidden sticks.
- Fill or mark deep ruts left by plows, delivery trucks, or soggy foot traffic.
- Check low spots that stay wet after rain and keep the mower out until the soil firms up.
- Trim tall border grass near fences, edging, steps, and raised beds if the mower struggled there last season.
If the grass is already tall, do an initial cleanup with a conventional mower or string trimmer before sending out the robot. Robot mowers are designed for frequent small cuts, not for knocking down an overgrown spring lawn in one pass.
Step 6: Set the first cut higher than your summer routine
Resist the urge to drop the mower straight to your preferred warm-weather cutting height. A higher first setting is kinder to the grass, easier on the blades, and less likely to leave clumps if growth is uneven.
As a practical rule, start near the upper end of your mower’s cutting range, then lower gradually over several mowing cycles if the lawn is healthy and growth is steady. The exact number depends on your grass type, mower, and lawn condition, but the principle is simple: restart with a light trim, not a scalping session.
Spring lawns can be patchy. Sunny slopes may surge ahead while shaded strips along a fence stay thin and damp. A cautious first height gives the robot mower a better chance to settle back into its route without turning weak turf into muddy wheel marks.
Step 7: Run a short supervised mow
For the first outing, choose a dry period and stay outside long enough to watch the mower leave the dock, enter the work area, turn near edges, cross transitions, and return to charge. This is not hovering; it is quality control.
Pay attention to:
- Dock departure: Does the mower back out and turn smoothly?
- Boundary behavior: Does it respect mapped or wired edges?
- Traction: Do the wheels slip on slopes, damp areas, or exposed roots?
- Obstacle response: Does it slow, turn, or stop as expected around furniture and tree bases?
- Cutting sound: Do you hear scraping, rattling, or repeated blade strikes?
- Return-to-dock behavior: Does it find the station without circling repeatedly?
If the mower gets stuck once, fix the cause and continue. If it repeats the same failure, stop the session and solve that location before scheduling automatic mowing. A small correction now beats rescuing the mower from the same wet corner all week.
Step 8: Restart the schedule gently
Once the mower completes a supervised run and charges normally, rebuild the schedule in stages. Early spring growth can be uneven, and the yard may need a different rhythm than it did in peak summer.
Begin with shorter or fewer sessions than your full-season schedule, then increase mowing time as growth accelerates. Keep rain, soil softness, and nighttime temperatures in mind. Even if a mower can operate in light rain, running on saturated ground can leave tracks and increase the chance of getting stuck.
For multi-zone yards, restart the easiest zone first. Add narrow passages, side yards, or slope-heavy areas after you confirm the mower is behaving normally. This staged approach makes problems easier to isolate.
Common spring restart mistakes
Starting with dull blades
Dull blades tear rather than trim. That can leave ragged grass tips and make the mower work harder than necessary. If the blades were already near the end of their life in the fall, replace them before the first mow.
Ignoring the dock position
A station that shifted an inch or two may still look fine to you, but it can change the mower’s approach angle enough to cause docking errors. Re-level and secure it before blaming the mower.
Letting the mower discover every branch
Robot mowers are not yard cleanup machines. The cleaner the lawn is on the first day, the more useful your restart test becomes.
Assuming last year’s map is still perfect
Virtual boundaries are only as good as the yard they describe. If edging, landscaping, fencing, or play equipment changed, review the map before setting the mower loose.
Restarting full automation too soon
The first unsupervised spring week is where small misses become repeated annoyances. Watch one run, make corrections, then automate with more confidence.
When spring reveals a mower-fit problem
Sometimes restart trouble is not really a storage problem. It is a yard-fit problem that winter makes more visible. Damp slopes, exposed roots, shaded side yards, and narrow muddy passages can expose limits that were easier to ignore in dry summer conditions.
If the mower repeatedly slips, loses position, fails to dock, or cannot manage a newly changed yard layout, compare the problem against the mower’s design rather than assuming a setting will fix everything. All-wheel-drive models, stronger slope capability, LiDAR navigation, RTK systems, and boundary-wire setups each solve different problems and create their own setup trade-offs.
For example, a compact AWD wire-free model such as the Segway Navimow i206 AWD is the kind of mower shoppers may compare when small, uneven yards need more traction than a basic two-wheel-drive layout. That does not mean every spring issue calls for a new mower, but it is a useful reminder to match the machine to the lawn you actually have.
Fast answers
Should I fully charge my robot mower before the first spring mow?
Yes. Let the mower complete a full charge before mowing so you can confirm the battery, dock, charging contacts, and app connection are all behaving normally after storage.
Do I need to replace blades every spring?
Not automatically, but spring is the right time to inspect them. Replace blades that are dull, bent, rusty, chipped, or uneven. If the mower finished last season with tired blades, start fresh.
Should I update the app before or after mowing?
Update before mowing when the app or mower prompts you. Then allow time for the mower to reconnect, reload its map, and confirm normal status before sending it out.
Can I mow if the lawn is still soft?
Wait if the mower leaves tracks, spins its wheels, or sinks into low spots. Soft soil can create ruts and repeat stuck points, even when the grass itself looks ready.
What if the mower will not leave the dock?
Check the battery charge, dock power, charging contacts, app lock settings, schedule, rain delay, boundary signal, and any stored error messages. If those look normal, restart the mower according to the manufacturer’s instructions and try a short manual session.
Set up the season, then let the routine take over
A good spring restart is calm and methodical: inspect, charge, clean, update, prepare the lawn, raise the first cut, supervise one run, and ease back into the schedule. Once those steps are done, robot mowing becomes what it should be again: a quiet routine that keeps the lawn tidy without turning every Saturday into a grass-management project.
If you are unsure whether a recurring problem is maintenance, mapping, or mower fit, make notes during the first supervised run. The exact place where the mower slips, loses its route, or fails to dock usually tells you far more than the error message alone.