A boundary-wire error usually arrives at the worst moment: the lawn is shaggy, the mower is parked, and the charging station is blinking like it knows something you do not. The good news is that a broken robot mower boundary wire is usually diagnosable with a few simple checks before you dig up half the yard.
Any repair involving the mower’s power supply, outdoor outlet, or hardwired electrical connection should be handled by a qualified electrician in compliance with local electrical codes and safety standards. Boundary-wire splicing is usually a low-voltage yard repair, but do not open power supplies or modify mains electrical parts.
The fastest route to the fault
To find and fix a boundary wire fault, first prove whether the charging station can generate a loop by using a short-loop test. If the station accepts a short temporary loop, the fault is in the yard wire; if it does not, inspect the station terminals, connectors, power supply, and outlet before repairing the wire. A full break usually creates a hard loop error, partial corrosion tends to cause intermittent faults, and connector failures often show up at old splices, dock terminals, or wet areas.
You are trying to answer four questions, in this order:
- Is the charging station powered and behaving normally?
- Can the station read a short test loop?
- Is the fault a clean break, corroded section, or failed connector?
- Can the damaged section be repaired with a weatherproof splice?
Tools and parts worth having before you start
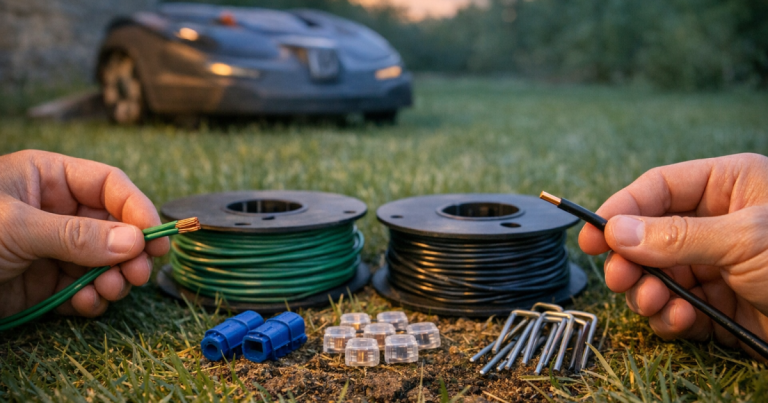
You do not need a truck full of contractor gear, but the right small parts make this job much less annoying. Keep the repair focused: locate the fault, expose as little turf as possible, and use connectors that can survive wet soil.
- Short spare length of compatible boundary wire for testing and patching.
- Waterproof gel-filled wire connectors or manufacturer-approved couplers.
- A low-voltage cable tracer, such as KOLSOL F02 Underground Cable Locator, for following buried wire.
- An AM radio for the common signal-tracing trick, where supported by the mower system.
- A multimeter with continuity mode for checking whether a wire path is open or connected.
- Small flags, painter’s tape, or stakes to mark suspected fault points.
- Hand trowel or narrow weeding tool for opening the turf carefully.
- Replacement couplers such as 3M Scotchlok 314 IDC Connector, if they suit your wire size and installation type.
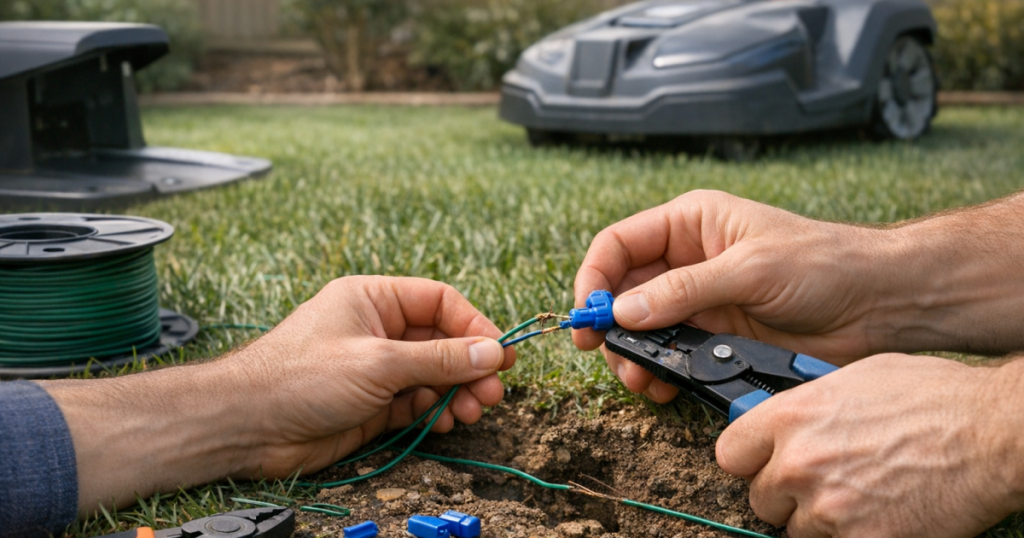
The connector matters more than many owners expect. Twisting wires together and wrapping them in tape can work for about as long as it takes you to feel optimistic, then moisture does what moisture does. Use a proper outdoor-rated connector or the coupler specified for your mower brand.
Step 1: Check the charging station before blaming the lawn
Start where the loop begins and ends. Unplug the station from power before reseating wire ends or inspecting terminals, then restore power only when the connections are secure.
- Look for loose boundary-wire ends at the station terminals.
- Check whether recent mowing, trimming, kids, pets, or a shifted base has tugged the wires.
- Inspect visible connectors for green corrosion, cracked housings, or damp soil around a splice.
- Confirm that the station is sitting flat and stable, because movement can strain terminals over time.
If the station has been unreliable in general, the location may be part of the problem. A stable, accessible charging station location reduces docking strain and makes future wiring checks much easier.
Also separate loop faults from power faults. If the station has no signs of power, behaves inconsistently, or the mower is also failing to dock or charge, use a broader charging diagnosis before chasing wire around the yard. Our guide to a robot mower that won’t charge covers those checks in more detail.
Step 2: Run a short-loop test
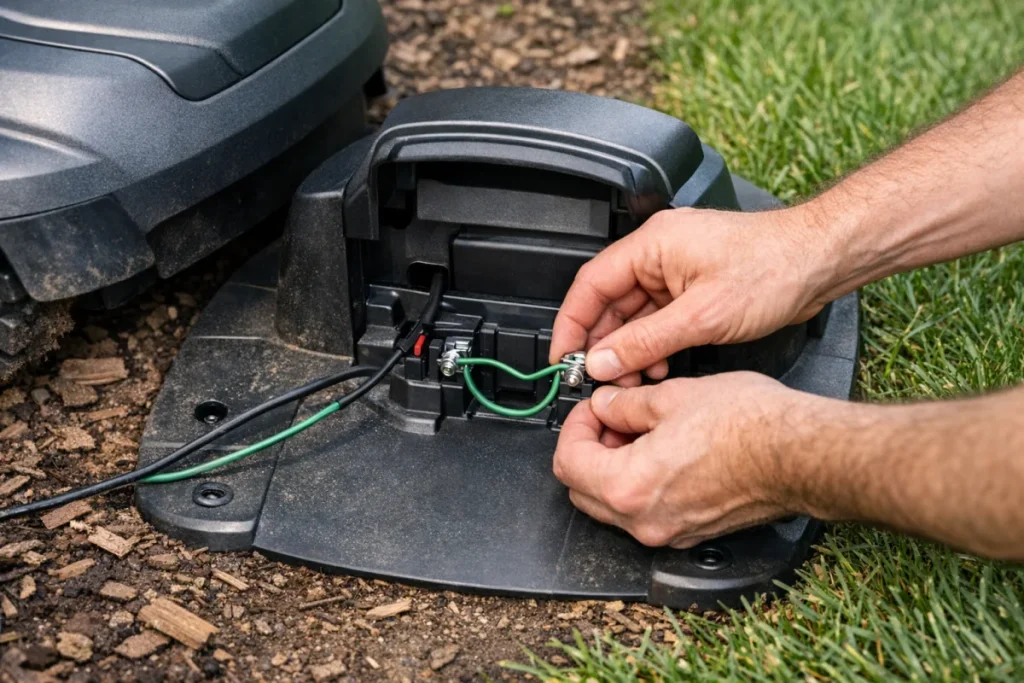
The short-loop test is the cleanest way to split the problem in two. Disconnect the installed boundary wire from the station. Then connect a short spare piece of boundary wire directly between the station’s boundary terminals, creating a tiny temporary loop near the base.
If the station now reports a healthy loop, the installed yard wire or one of its connectors is the likely fault. If the station still reports a loop problem, look again at the station terminals, couplers, power supply, and manufacturer troubleshooting codes before cutting into the lawn.
This test is worth doing even when you are convinced you saw the neighbor’s aerator hit the wire. Assumptions are how a ten-minute repair turns into a Saturday archaeology project.
Step 3: Decide whether it is a clean break, corrosion, or connector failure
Full wire break
A full break is an open circuit. The mower or station usually gives a clear missing-loop style error, and a continuity check across the full boundary loop will not show a complete path. Common causes include edging, aeration, animals, new landscaping, fence work, and shallow wire pulled up by roots or frost movement.
Partial corrosion
Partial corrosion is sneakier. The mower may work some days and fail after rain, irrigation, or soil movement. Look for old splices, cheap connectors, exposed copper, or spots where the insulation has been nicked but not fully severed.
Connector failure
Connector failures are especially common where earlier repairs were made quickly. A connector can look intact while the internal metal contact is corroded or the wire is not fully seated. Any suspect splice near wet soil deserves attention before you start tracing hundreds of feet of wire.
Step 4: Find the damaged section without digging trenches
Begin with a slow visual walk. Follow the boundary path and look for fresh soil, cut marks, new mulch beds, driveway edging, utility work, sprinkler repairs, dog digging, or places where the wire crosses a narrow passage. Most breaks have a story; your job is to notice the scene of the crime.
If nothing obvious appears, use one of these tracing methods:
- Cable tracer method: connect the transmitter as directed by the tool instructions, then follow the signal along the buried wire. A sudden signal drop can point to the break or a bad connector.
- AM radio method: on some systems, an AM radio tuned off-station can pick up a change in buzz or interference as you follow the boundary signal. This trick is not universal, but it can be surprisingly helpful on compatible setups.
- Divide-and-test method: use a temporary wire to bypass half of the loop, then test the station. Keep splitting the suspected section until the fault area is small enough to inspect by hand.
The divide-and-test method is not glamorous, but it is dependable. It also helps separate a single damaged spot from a chain of questionable old splices.
Step 5: Make the repair
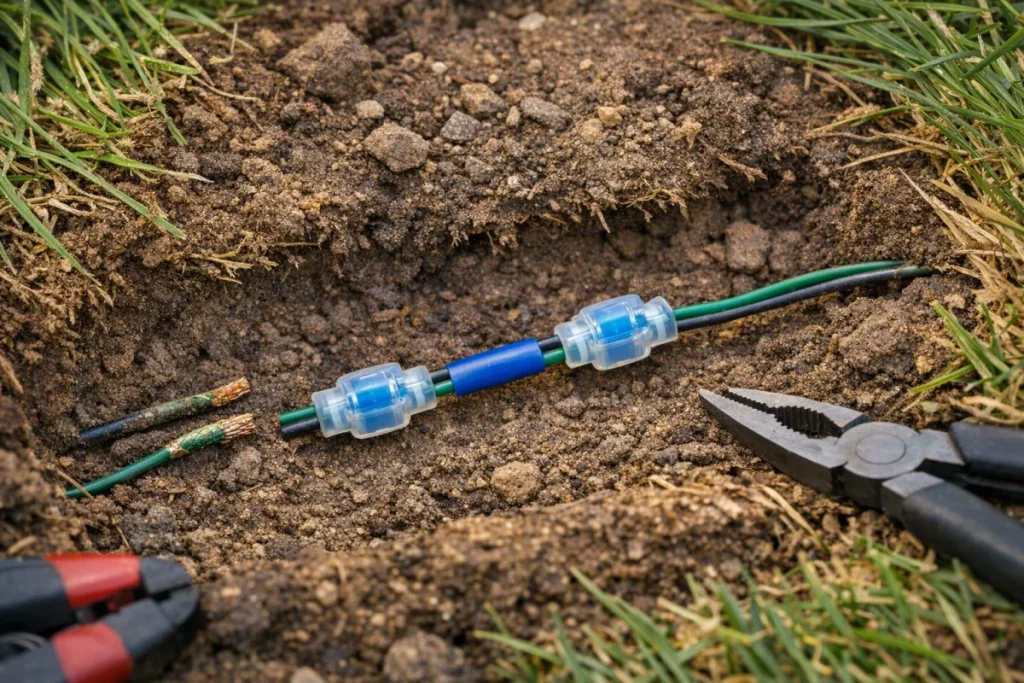
Once you find the break, expose only enough wire to work comfortably. If the copper is blackened, brittle, or green with corrosion, cut back to clean wire. If there is not enough slack to rejoin the ends without tension, add a short patch of compatible boundary wire between two waterproof connectors.
- Turn off power to the station before handling the wire.
- Cut out damaged or corroded wire rather than burying a weak section again.
- Use the connector exactly as directed; some couplers are designed to bite through insulation, while others require stripped ends.
- Keep the repaired section relaxed, not stretched tight.
- Press the wire back into its route and secure it so mower wheels, rakes, or edgers will not pull it up.
- Restore power and confirm the station shows a good loop before reburying everything neatly.
After the repair, send the mower around the repaired boundary if your model allows a test run. Watch the mower’s behavior near the repair, nearby corners, and any narrow passages. One fixed fault can reveal another weak connector farther along the loop, which is irritating but better discovered while your tools are still out.
How to prevent the next boundary-wire failure
A repaired wire can be just as reliable as the original installation when the splice is weatherproof and strain-free. The recurring failures tend to come from poor connector choices, shallow exposed runs, and unknown wire routes that get hit during normal yard work.
- Map the boundary route and keep a copy with your mower paperwork.
- Flag wire runs before aerating, edging, trenching, or adding landscape beds.
- Use compatible boundary wire when adding patches or rerouting sections.
- Replace questionable old tape-and-twist repairs with gel-filled outdoor connectors.
- Inspect visible wire, dock connections, and known splice points during seasonal service.
For a broader ownership routine, fold boundary-wire inspection into a robot lawn mower maintenance checklist instead of waiting for the next flashing error light.
Common questions
Can I repair boundary wire with regular electrical tape?
Electrical tape alone is not a reliable buried repair. Soil moisture can reach the copper, causing corrosion and intermittent loop faults. Use a waterproof outdoor connector or the mower manufacturer’s approved coupler.
Does the AM radio method always work?
No. It depends on the mower system, the signal being generated, soil conditions, and the radio. Treat it as a helpful locating trick, not a guaranteed diagnostic tool.
Should I replace the whole loop after one break?
Usually not. One clean cut can be patched. Consider larger replacement only if the wire is brittle, repeatedly corroded, poorly routed, or full of failing old splices.
What to remember
Do not start by digging. Start at the station, prove the loop with a short test wire, then trace the fault only after you know the yard wire is the problem. Most boundary-wire repairs come down to three parts: patient diagnosis, clean copper, and a connector that can handle wet ground. That is not flashy technology, but it is exactly the kind of unglamorous fix that keeps a robot mower earning its keep.